Front inner skin
TLDR
- Installed front inner skin for both sides
Details
Since everything that needs to go behind the front inner skin are already in place, I don’t see any point delaying installing them. Besides, I want to install them before putting on more instrument panel stuff because they compete on the space here.
So today I fitted the skins and riveted them permanently. It’s been a while since I zipped so many rivets, it felt good to see the progress :)
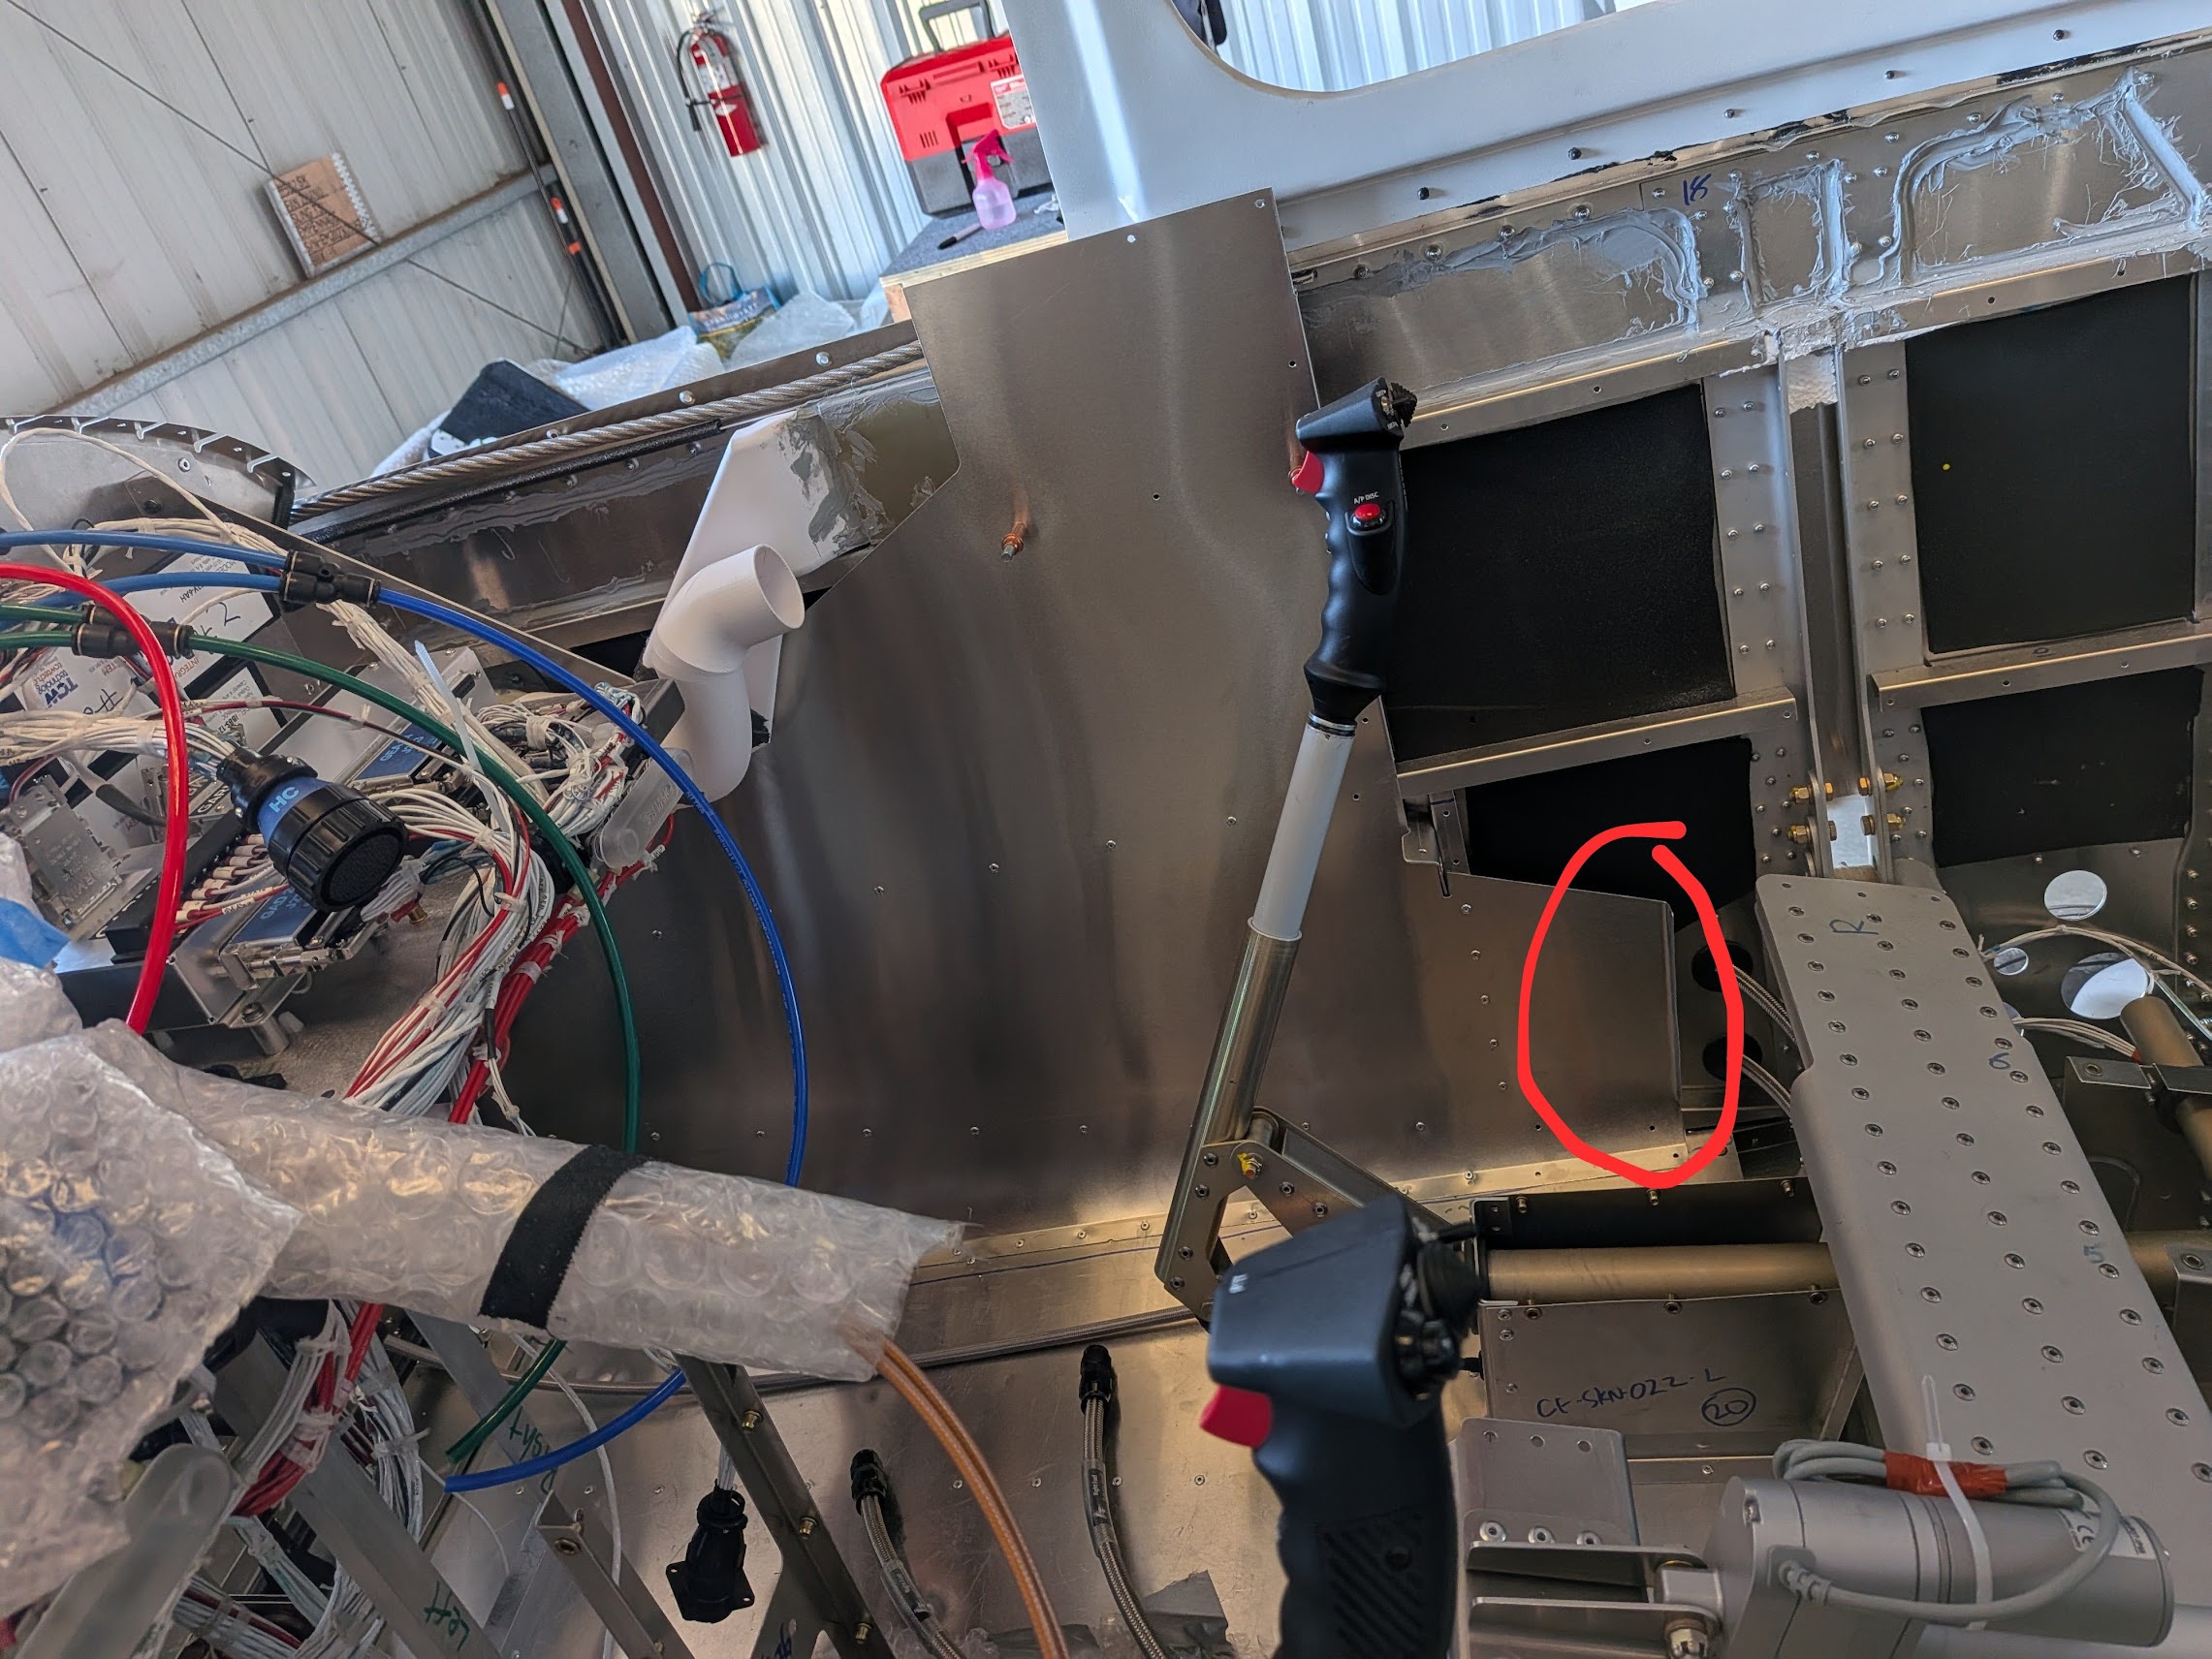
Fitting and trimming
Fitting the left side was a little tricky. The skin could only go into position at a certain angle, and the rear end of the skin touches the fuel line by a few millimeters, so it bends unnaturally. I had to take it in and out a few times to figure out how to best deal with the interference with the fuel line.
I decided to cut off a small chunk of the skin to provide clearance to the fuel system. It will probably help future inspection too. I ended up cutting about 2 inches off and had to bend the aluminum to make a new 90 degrees tab.
The right side was much easier. I didn’t have to jiggle with the skin to find measurement. I just use the left side as a template and cut off the same amount. It worked fine.
Upholstery issue
Since I trimmed off a small chunk from both sides, I expect the side panel upholstery will be slight too long. So I will probably have to cut off some chunk of the upholstery panel, which is not a big deal and I will cross this bridge another day.
Riveting
Most of the holes on the side matches perfectly except the last 2 or 3 towards the rear. This seems to be a common problem, and Evan also mentioned this on his video. So I’m not too worried. The rivets on the bottom though is another story. Most of them just do not align. I just drilled new holes to secure them on the floor.


